Welcome to the Secret Checklist Behind Perfect Porcelain Veneers
Purpose of the checklist is to give patients a clear roadmap that guarantees every clinical step—from oral exam and shade selection to enamel reduction, temporary mock‑up, and final bonding—is performed consistently and safely. By empowering patients with knowledge, the checklist transforms a complex cosmetic procedure into an informed partnership; patients can ask targeted questions, compare before‑and‑after photos, and verify that the dentist follows best‑practice protocols. The veneer journey begins with a comprehensive exam, moves through digital smile design or wax‑up, proceeds to minimal enamel preparation (0.3‑0.5 mm), temporary provisional placement, and finishes with precise bonding, polishing, and personalized after‑care instructions today.
From Consultation to Final Bond: The Veneer Installation Journey
 The journey begins with an initial assessment and digital imaging, where the dentist checks oral health, takes X‑rays and uses intra‑oral scanners or photographs to preview the smile. Minimal enamel preparation follows, typically removing 0.3–0.5 mm (sometimes up to 0.7 mm for lighter shades) to create space for the thin porcelain shell while preserving as much natural tooth as possible. An impression or digital scan of the prepared teeth is then sent to a lab, which fabricates the custom veneers over 1–2 weeks. While the permanent restorations are being made, temporary veneers are placed to protect the teeth and give the patient a preview of the final aesthetics. When the final veneers arrive, the dentist checks fit, makes minor adjustments, cleans and etches the tooth, applies bonding resin, and seats the veneer. A curing light hardens the cement, excess material is removed, and a bite check ensures proper occlusion. The entire procedure usually spans two to three appointments over a few weeks, with each prep visit lasting 30–90 minutes per arch.
Understanding the Investment: Veneer Costs and Planning
 Porcelain veneer pricing varies by material and dentist expertise. At Empower Your Smile a single porcelain veneer typically costs $1,300‑$2,200 (national average $1,765), while composite options run $500‑$800 less per tooth. A full‑mouth makeover of six‑to‑eight veneers therefore ranges from $8,000‑$15,000, depending on material choice and any prerequisite treatments (gum disease therapy, orthodontics, whitening, etc.).
Financing is offered through flexible payment plans and low‑interest loans, and the team provides an itemized estimate during the initial consultation.
The “4‑8‑10 rule” helps determine veneer quantity: four veneers cover the central incisors, eight extend from canine to canine, and ten reach the first premolars for broader smiles.
Additional preparation costs include professional whitening ($150‑$600), gum contouring ($300‑$1,000), minor enamel reduction ($100‑$600), digital scans ($100‑$300) and diagnostic X‑rays ($50‑$200). Temporary veneers, if used, add $200‑$500. All prep items are itemized and added to the per‑tooth price.
Two front‑teeth veneers cost $1,800‑$5,000 for porcelain or $600‑$1,600 for composite, plus any prep fees.
Clinical Blueprint: Preparing Teeth for Porcelain Veneers
 Best dentist preparation before veneers
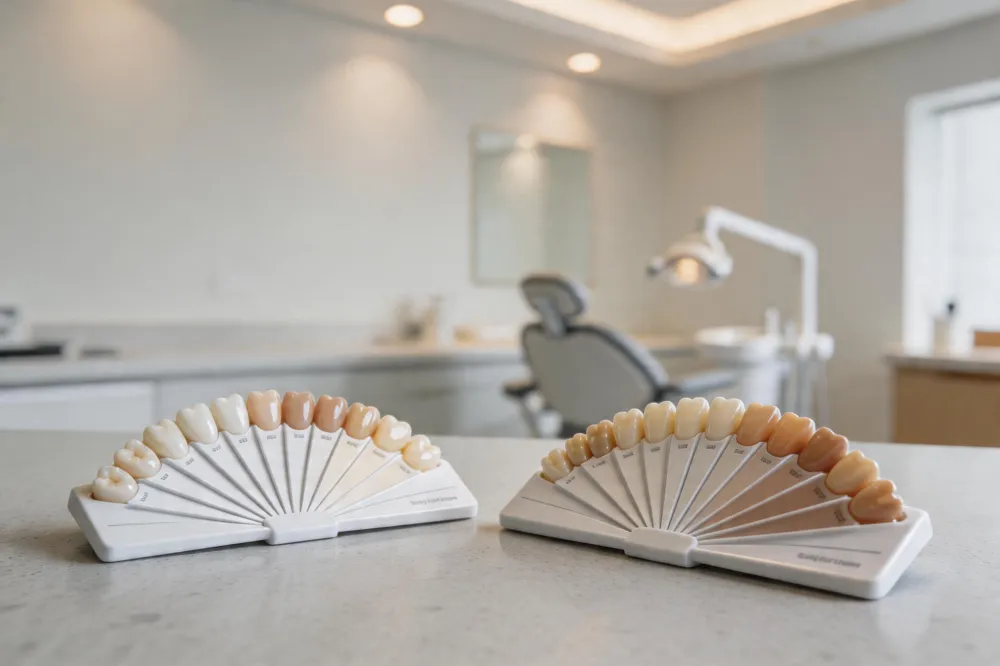
A thorough case starts with a comprehensive oral exam and digital smile design to assess health, occlusion, and facial aesthetics. Early shade selection is critical—each shade lighter may add ~0.2 mm of enamel reduction. Using a diagnostic wax‑up or virtual mock‑up the clinician plans the preparation (no‑prep, minimal‑prep, or conventional) to preserve enamel while achieving the desired contour.
Best dentist preparation before veneers
A thorough case starts with a comprehensive oral exam and digital smile design to assess health, occlusion, and facial aesthetics. Early shade selection is critical—each shade lighter may add ~0.2 mm of enamel reduction. Using a diagnostic wax‑up or virtual mock‑up the clinician plans the preparation (no‑prep, minimal‑prep, or conventional) to preserve enamel while achieving the desired contour.
Ideal veneer prep Aim for 0.3 mm chamfer margin and facial reduction of 0.5–0.7 mm for minimal‑prep or 0.8–1.0 mm for conventional cases. Interproximal reduction is limited to half the contact, and the incisal edge is shaped 0.75–1.5 mm with a gentle butt‑joint to hide margins.
Types of veneer preparation Traditional (conventional), minimal‑prep, and no‑prep (e.g., Lumineers) options exist, each varying in enamel removal. Indirect CAD/CAM veneers can follow any of these approaches.
Veneer preparation step by step
- Smile analysis, shade selection, and mock‑up. 2. Mark depth cut (0.5–0.7 mm) and create chamfer. 3. Reduce interproximal surfaces halfway. 4. Shape incisal edge and verify enamel stay. 5. Take impression and place provisional.
Veneer prep break contact Contacts are only broken when closing diastemas, correcting black triangles, or accommodating restorations. A careful slice ensures proper veneer seating without undercuts, preserving enamel for a strong bond.
Temporary Solutions, Patient Comfort, and Documentation
 During veneer placement, dentists often use provisional restorations to protect the freshly prepared teeth and to preview the final result. For one‑ or two‑unit cases, a direct composite provisional is quick to place, can be trimmed chair‑side and bonded with spot‑etch and flowable composite. In three‑ to six‑unit cases, BioTemps® provisionals provide precise gingival embrasure control and can be relined for a perfect fit. These temporary veneers shield the enamel from sensitivity, staining and bite changes while the permanent porcelain is fabricated.
Patients with dental anxiety can remain awake with only local anesthesia for the enamel reduction, but mild sedation options such as nitrous oxide or oral sedatives are available for added comfort; general anesthesia is never required.
Clinicians rely on detailed PDF guides that outline every step—from comprehensive exam, shade selection, and depth‑cut preparation (0.3–0.5 mm) to impression techniques and temporization—ensuring consistent, enamel‑preserving results. Before‑and‑after visual tools, including digital mock‑ups and photographic documentation, let patients see the anticipated transformation and help the dentist fine‑tune the design before final bonding.
Specialty Cases: Canine and Premolar Veneers & Clinical Decisions
 Canine veneer prep – After a thorough exam, diagnostic photos and shade selection, local anesthesia is administered. A shallow facial depth groove (0.3‑0.5 mm for mild‑moderate discoloration, up to 0.75 mm for deeper changes) is placed, followed by a light chamfer at the gingival crest. The facial surface is reduced in two to three planes, blended smoothly into the gingival and proximal areas, and all sharp angles are rounded. The incisal edge is lowered to allow 1.0‑1.5 mm of porcelain thickness, while the lingual side receives a butt‑joint margin to preserve enamel. Contacts are lightly opened, the preparation polished, and a provisional or direct composite veneer may be placed before the final impression.
Premolar veneer prep design – A conservative facial reduction of 0.3‑0.5 mm preserves enamel. A “step” design placed about 1.5 mm from the cusp tip or a full wrap‑over can be used, with a butt‑joint incisal reduction providing superior marginal adaptation. Shade selection dictates extra reduction (≈0.2 mm per shade change). Verify occlusion after prep, ensuring margins end appropriately relative to opposing contacts.
Why dentists may advise against veneers – Active gum disease, insufficient healthy enamel, severe bruxism, unrealistic expectations, poor oral hygiene, or a high‑staining diet can increase failure risk. In such cases, more conservative or restorative options are recommended to preserve tooth structure and periodontal health.
Long‑Term Outlook: Pros, Cons, and Longevity of Veneers
 Aesthetic advantages: Porcelain veneers deliver an instant, natural‑looking smile by masking stains, chips, gaps, or minor misalignment. Advanced shade‑matching and digital mock‑ups let clinicians tailor color and shape to a patient’s facial features, while the thin ceramic shell resists staining and mimics tooth translucency.
Potential drawbacks: The procedure is irreversible—0.3‑0.5 mm of enamel must be trimmed, permanently altering the tooth. Temporary sensitivity to hot or cold foods is common, and the cost (often $1,000 + per tooth) is usually out‑of‑pocket because insurance treats veneers as cosmetic. Bruxism, hard‑food habits, or neglecting oral hygiene can lead to chipping or debonding.
Expected lifespan and maintenance: With proper care—regular brushing, flossing, avoiding abrasive or staining foods, and routine dental visits—porcelain veneers typically last 10‑15 years. Night guards help protect against grinding.
Patient expectations: Veneers are a permanent solution in that the enamel removal cannot be undone, but they are not lifelong. Replacement may be needed after a decade or more, depending on habits and maintenance.
Putting It All Together: Your Path to a Confident Smile
The secret veneer checklist starts with a thorough oral exam, shade selection, and a diagnostic mock‑up to preview the final smile. Empower Your Smile follows each step: they document enamel thickness, capture detailed photos, and use digital smile design to create a personalized treatment plan. Temporary mock‑ups let patients see shape, shade, and function before permanent porcelain is bonded. After bonding, the team educates patients on hygiene, diet, and regular check‑ups to protect the restoration. Interested patients should schedule an initial consultation, discuss goals, and receive a customized roadmap toward a lasting, confident smile.